Anyone who has ever had children knows what I'm talking about. In fact, there was just an episode of Modern Family that covered the topic.
While I was pregnant, "mommy brain" didn't really rear it's ugly head. However, as soon as I came home with Little Bub, it really kicked in. In the beginning it was pretty harmless: leaving the house for Little Bub's first peds appointment with slippers on, forgetting why I went into a room or if I brushed my teeth.
And guess what? It's not getting any better. Just within the past week I took Little Bub to swim lessons without bringing towels, forgot to take my lunch to work, and left the house without my glasses.
Recently, I even drove 20 minutes to the grocery store, only to have to drive all the way back home because I had forgotten my purse. Of course, I had to drive back to the store because I hadn't gotten any groceries!
This article on Discovery News claims that in actuality mothers don't lose brain function, but instead their brains rewire based on a whole new set of priorities linked to the care of their children. That's all well and good, but what about the time I left the house for the first major shopping trip (read a 45 minute drive away from home) and I forgot to bring the bottle of pumped milk my 4 month old son needed, which I had left on the counter in an insulated bag. Let me tell you, nothing makes you feel worse! Luckily I was able to solve the problem by buying a new bottle and some formula at Wal-Mart.
Whatever the case, I sure wouldn't trade in Little Bub for anything in the world, including some lost brain power!
Friday, November 30, 2012
Monday, November 26, 2012
My Long Thanksgiving Weekend
Working in a school has its perks, I must admit. One of those is having a five day weekend to spend crafting and loving up Little Bub.
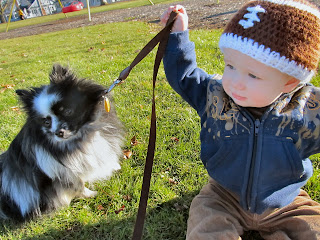
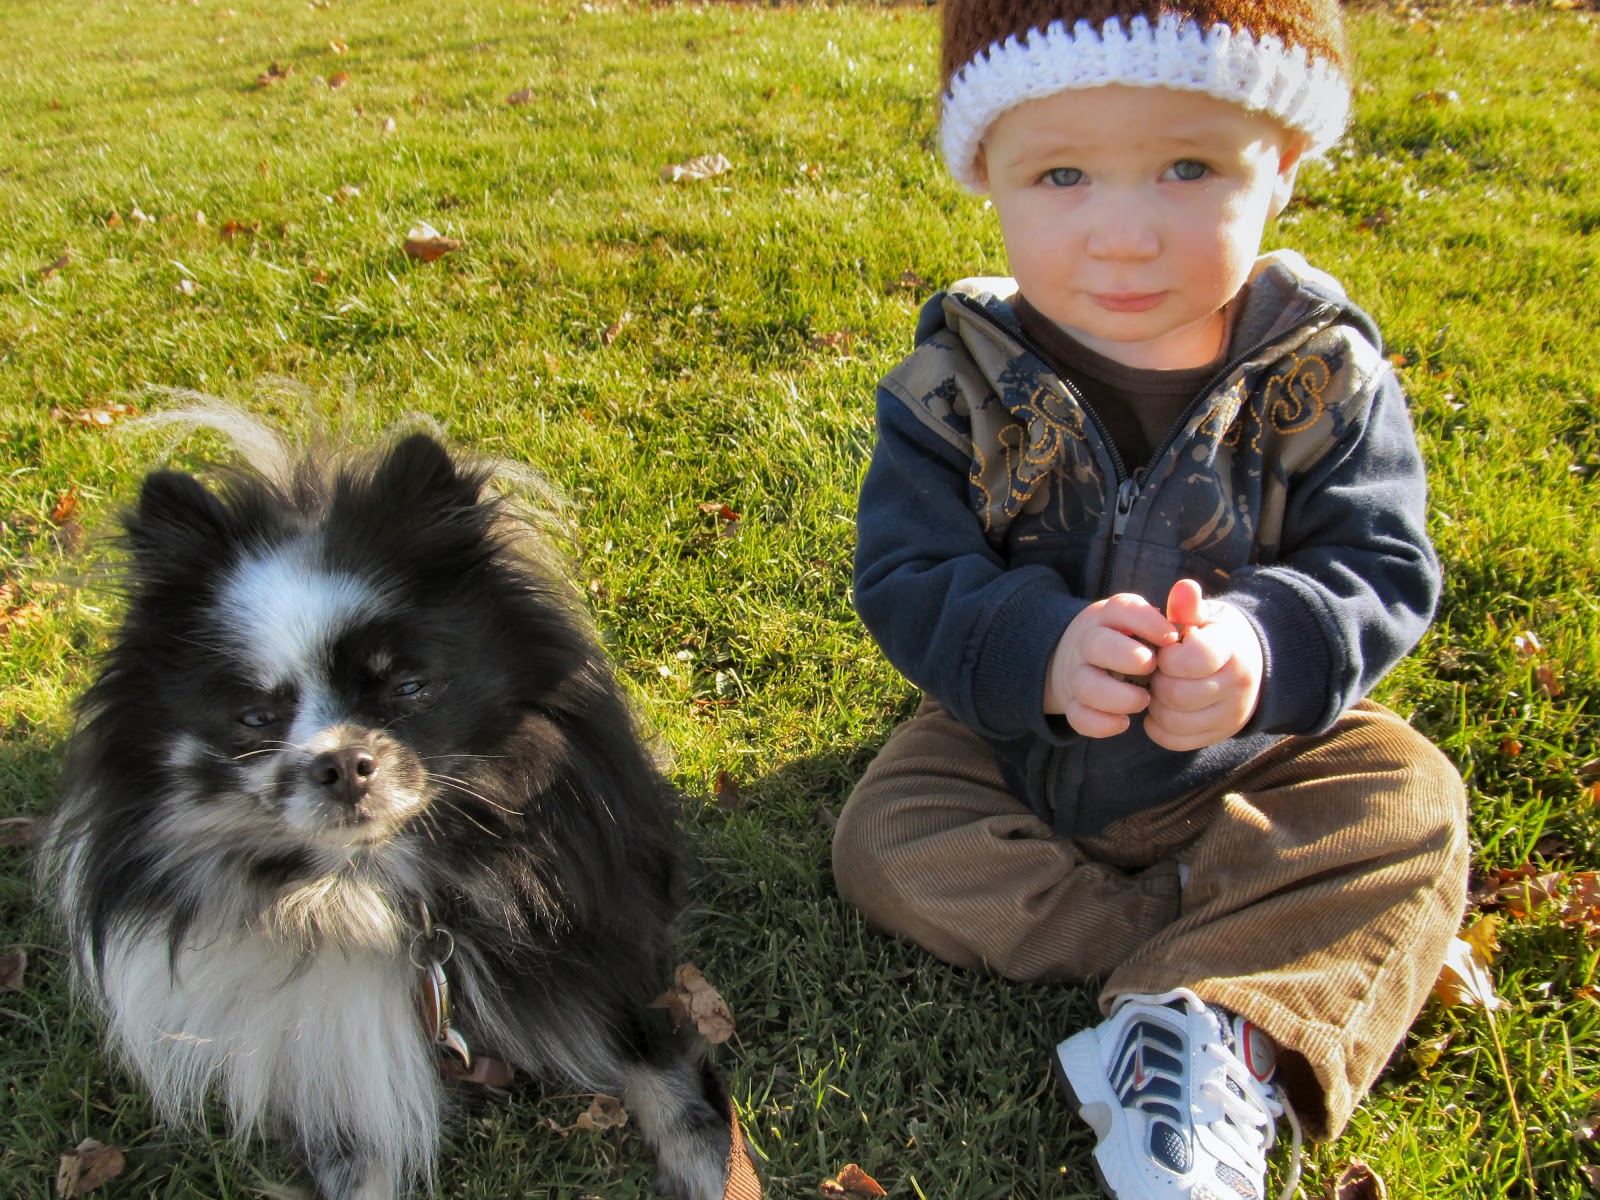
On Wednesday, I decided to take advantage of the unusually mild, sunny weather and take Little Bub to the park.


We brought our dog too. Poor Frankie. He's generally a good sport as long as Little Bub isn't reaching for a handful of fur.
On Thursday, we spent time with both sides of our family. My sister-in-law kindly agreed to snap a few shots for our Christmas cards. She has amazing talent!

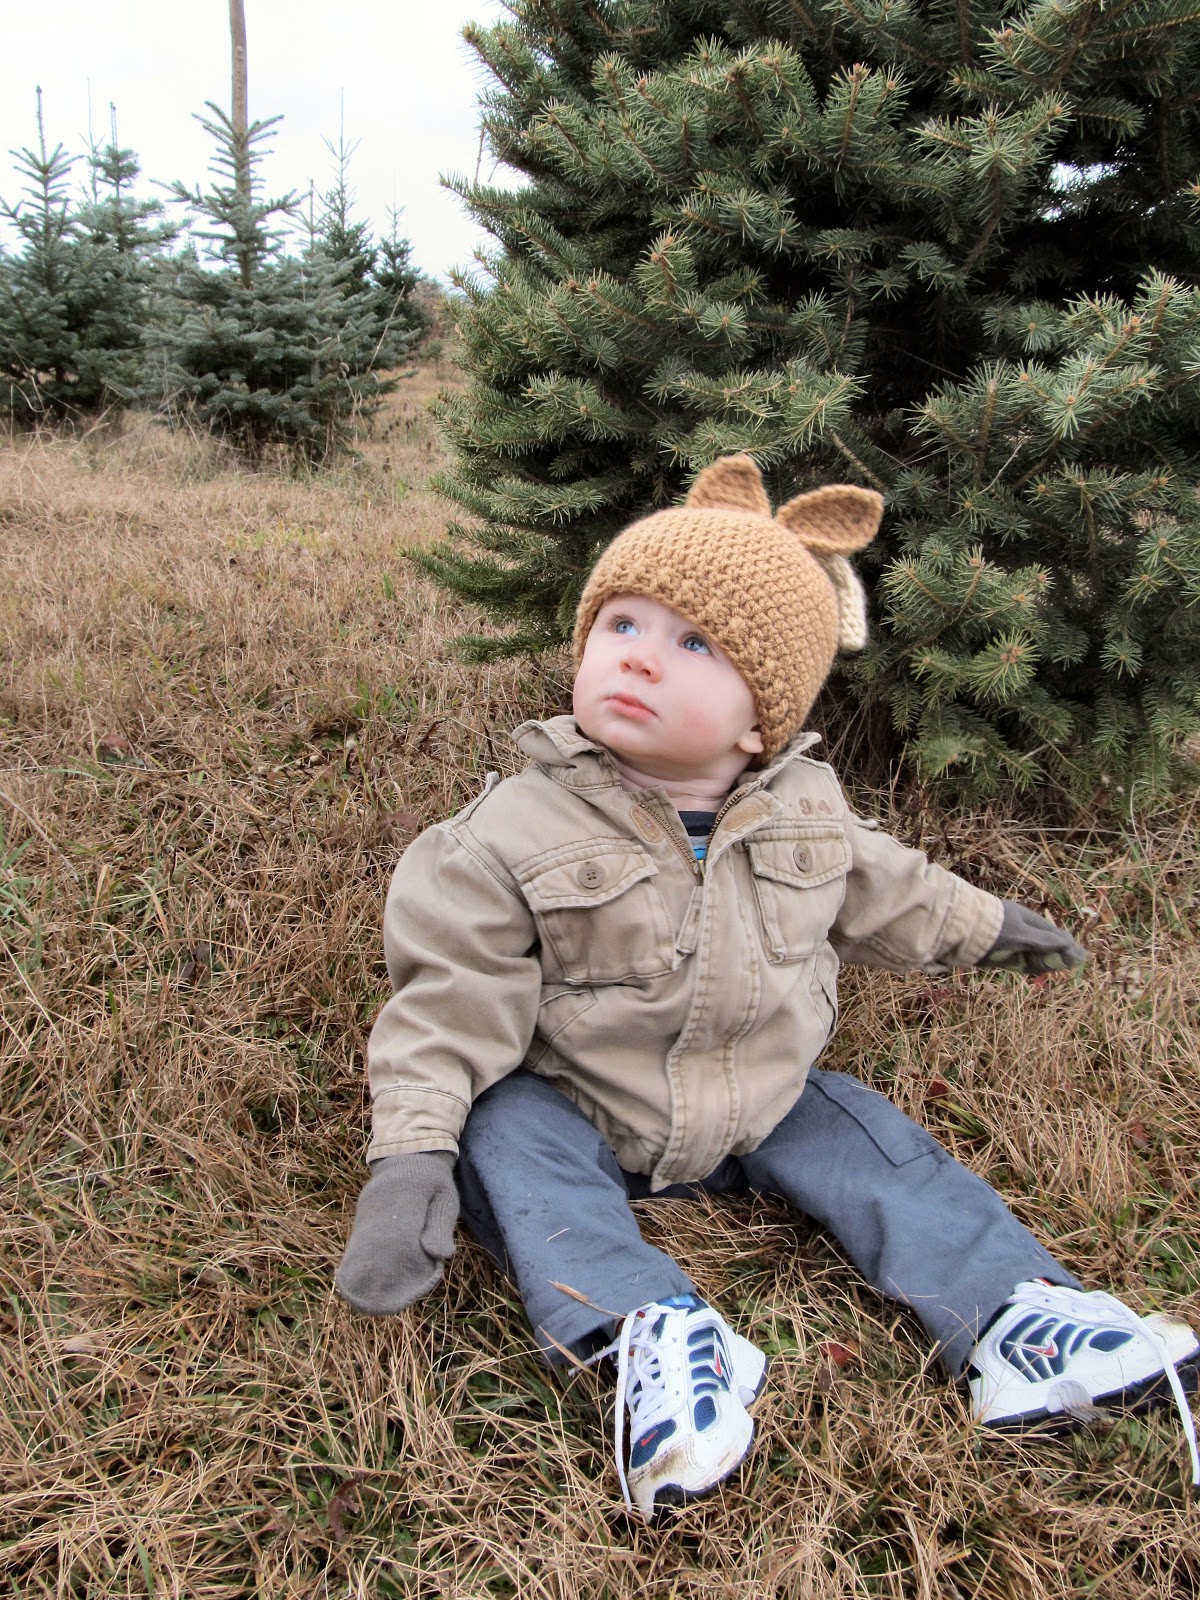
 On Friday, we went to go pick our Christmas tree. The past few years we used a fake one, but with Little Bub around we wanted to start the tradition of having a real one. It was a little colder outside, but still a nice enough day to walk around the tree farm.


The rest of the weekend was pretty normal. I worked on some crafts while Little Bub helped, Little Bub had swimming lessons and we took some much needed naps. I was sad to see the weekend come to an end.

On Wednesday, I decided to take advantage of the unusually mild, sunny weather and take Little Bub to the park.

We brought our dog too. Poor Frankie. He's generally a good sport as long as Little Bub isn't reaching for a handful of fur.

On Thursday, we spent time with both sides of our family. My sister-in-law kindly agreed to snap a few shots for our Christmas cards. She has amazing talent!


The rest of the weekend was pretty normal. I worked on some crafts while Little Bub helped, Little Bub had swimming lessons and we took some much needed naps. I was sad to see the weekend come to an end.

Thank You Cards
Little Bub's birthday was now three weeks ago. I've been working on some homemade thank you cards and have finished them up today!
I was inspired by these thank you cards from my pinterest board (original source unknown).

It was a very simple project and perfect to fit in those extra ten minute slots you get between all the chores, work and playing you do with a one year old.
First, I picked some green paint I had in the drawer, poured it onto a small plate and cut an apple in half. I got out some sheets of white cardstock too.


I was inspired by these thank you cards from my pinterest board (original source unknown).
It was a very simple project and perfect to fit in those extra ten minute slots you get between all the chores, work and playing you do with a one year old.
First, I picked some green paint I had in the drawer, poured it onto a small plate and cut an apple in half. I got out some sheets of white cardstock too.

Put the apple in the paint, making sure all of the cut side is covered and firmly press the apple onto the cardstock.


Repeat until you have filled the paper or made as many apples as you need.

Sometimes I had too much paint and other times I didn't have enough to make a good print. I made a lot of extra so I could pick and choose the ones I liked. I cut out the apples with just a thin margin of white showing around the edges.
To add something extra and because they were thank you cards (and I already had the stamp), I used some dark green ink and stamped the apples. First I experimented with some gold ink because I had used some gold accents in other party decorations, but it didn't show up how I wanted it to.


Finally, I wrote on the backs of the apples to thank each individual for coming to the party and bringing Little Bub a gift. Originally, I was going to paste them or tie them onto bigger cards instead of writing on the back, but with our Christmas cards arriving within the next two days, I'm just going to slip these in those envelopes.
Thank you cards are something that helps your children show their appreciation for things and don't take much extra time at all. As I said before, these small steps can be slotted into those times between other jobs and when your children are older, this might be something they actually enjoy doing on their own because it does add a little creativity.

Thursday, November 22, 2012
Happy Thanksgiving
This is what I'm most thankful for this year.

A little man who is healthy, happy and continuing to grow everday.
Look how much Little Bub has changed in just one year! It makes me a little sad to see the difference. But he is still my little baby.
I can't forget to mention all the other blessings in my life, including my family, friends, home, job and the countless little things that make my life wonderful.
Happy Thanksgiving!
Wednesday, November 21, 2012
Gingerbread Man Hat
Finally it was a nice enough day to get some pictures of the gingerbread man hat. And Little Bub was content to have his picture taken in it. Most times, he just rips the hats off as soon as I put them on!
I was inspired by this hat on Etsy. It looked easy enough and it was a very fast hat to make.

Optional: For girls, you could crochet a little bow or even just make one out of ribbon and sew that to the top of the hat. I've even seen ones that have little black eyelashes! Check out the girl version on Etsy!


I was inspired by this hat on Etsy. It looked easy enough and it was a very fast hat to make.

Gingerbread Man Hat
Supplies Needed:
-Worsted Weight Yarn
-Size J Crochet Hook
Hat Instructions (1-3 Years
Size):
With brown, ch 3, slst in first ch to form loop.
Round 1: Ch 2 (counts
as hdc), 9 more hdc in loop. Join with slst to first hdc. (10 hdc)
Round 2: Ch 2, hdc in
same stitch. 2 hdc in next stitch and each stitch around. Join with slst to
first hdc. (20 hdc)
Round 3: Ch 2, hdc in
same stitch and in next stitch. *2 hdc in next stitch, hdc in next stitch.
Repeat from * around. Join with slst to first hdc. (30 hdc)
Round 4: Ch 2, hdc in
same stitch and in next 2 stitches, *2 hdc in next stitch, hdc in next 2
stitches. Repeat from * around. Join with slst to first hdc. (40 hdc)
Round 5: Ch 2, hdc in
same stitch and in next 3 stitches, *2 hdc in next stitch, hdc in next 3
stitches. Repeat from * around. Join with slst to first hdc. (50 hdc)
Round 6: Ch 2, hdc in
same stitch and in next 4 stitches, *2 hdc in next stitch, hdc in next 4
stitches. Repeat from * around. Join with slst to first hdc. (60 hdc)
Rounds 7-14: With brown, ch 2, hdc in next stitch and each stitch
around. Join with slst to first hdc. (60 hdc) Do not finish off.
First Ear
Flap
Row 1: Ch 2, hdc in next 15 sts. (16 hdc)
Row 2: Ch 2, hdc in next stitch, skip next stitch, hdc in
next 10 hdc, skip next hdc, hdc in last 2 hdc. (14 hdc)
Row 3: Ch 2, hdc in next stitch, skip next stitch, hdc in
next 8 hdc, skip next hdc, hdc in last 2 hdc. (12 hdc)
Row 4: Ch 2, hdc in next stitch, skip next stitch, hdc in
next 6 hdc, skip next hdc, hdc in last 2 hdc. (10 hdc)
Row 5: Ch 2, hdc in next stitch, skip next stitch, hdc in
next 4 hdc, skip next hdc, hdc in last 2 hdc. (8 hdc)
Row 6: Ch 2, hdc in next stitch, skip next stitch, hdc in
next 2 hdc, skip next hdc, hdc in last 2 hdc. (6 hdc)
Row 7: Ch 2, skip next stitch, hdc in next next 2 hdc, skip
next stitch, hdc in last hdc. (4 hdc)
Row 8: Ch 2, skip next 2 hdc, hdc in lath dc. (2 hdc) Finish
off.
Second Ear
Flap
Row 1: Skip 14 hdc on round 14 from edge of first ear flap,
join with slst in next hdc, ch 2, hdc in next 15 sts. (16 hdc)
Row 2: Ch 2, hdc in next stitch, skip next stitch, hdc in
next 10 hdc, skip next hdc, hdc in last 2 hdc. (14 hdc)
Row 3: Ch 2, hdc in next stitch, skip next stitch, hdc in
next 8 hdc, skip next hdc, hdc in last 2 hdc. (12 hdc)
Row 4: Ch 2, hdc in next stitch, skip next stitch, hdc in
next 6 hdc, skip next hdc, hdc in last 2 hdc. (10 hdc)
Row 5: Ch 2, hdc in next stitch, skip next stitch, hdc in
next 4 hdc, skip next hdc, hdc in last 2 hdc. (8 hdc)
Row 6: Ch 2, hdc in next stitch, skip next stitch, hdc in
next 2 hdc, skip next hdc, hdc in last 2 hdc. (6 hdc)
Row 7: Ch 2, skip next stitch, hdc in next next 2 hdc, skip
next stitch, hdc in last hdc. (4 hdc)
Row 8: Ch 2, skip
next 2 hdc, hdc in lath dc. (2 hdc) Finish off.
Edging: With red
and white together, slst in back of hat near the seam. Ch 1, sc in next stitch
and each stitch around. Finish off.
To make braids: Cut 3
white and 6 red pieces of yarn, 36 inches long. Pull halfway through the
bottom center of each ear flap. Separate into 3 equal groups and braid to
desired length. Tie a knot in the bottom and trim the ends.
Make 2 cheeks: With red, ch 3, slst in first chain to form a loop.
Ch 2, hdc 5 times in loop, slst to join (6) Finish off.
Mouth: With white, sew a couple of stitches across to make the
mouth.
Eyes: Sew two large black buttons onto hat.


Sunday, November 18, 2012
Favorite Finds
Last night, my husband and I went on a much needed mini-shopping trip and dinner date. We made a couple stops and I am so excited about some of my purchases I wanted to share them!
One of our last stops was at Old Navy. Some of my favorite hand-me-down sweaters for Little Bub are from there, so I though I'd see what they have for this season. Well, it was a bust for the sweaters, but I found some other things for Little Bub.
I love the colors of the bodysuits. I think Little Bub looks great in gray and blue things, so these were perfect! And of course, I just love penguins.


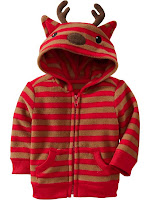
I couldn't pass up the hooded fleece. It's just adorable. And the fact that it's a zip-up makes it even better! We're all about the zip-up hoodies in this house. They keep Little Bub warm without puffing him up like a marshmallow, they're easy to get on and off and the hood adds an extra layer in case of wind or rain.
Finally, I bought the booties for Little Bub to wear as slippers in the house. Any mother of a baby knows how difficult it is to keep socks on a baby's feet. Little Bub is famous for pulling his socks off and throwing them around the house, or even backseat of the car! I'm hoping these little things will stay on his feet better and keep his feet cozy this winter.

One of our last stops was at Old Navy. Some of my favorite hand-me-down sweaters for Little Bub are from there, so I though I'd see what they have for this season. Well, it was a bust for the sweaters, but I found some other things for Little Bub.
I love the colors of the bodysuits. I think Little Bub looks great in gray and blue things, so these were perfect! And of course, I just love penguins.


I couldn't pass up the hooded fleece. It's just adorable. And the fact that it's a zip-up makes it even better! We're all about the zip-up hoodies in this house. They keep Little Bub warm without puffing him up like a marshmallow, they're easy to get on and off and the hood adds an extra layer in case of wind or rain.
Finally, I bought the booties for Little Bub to wear as slippers in the house. Any mother of a baby knows how difficult it is to keep socks on a baby's feet. Little Bub is famous for pulling his socks off and throwing them around the house, or even backseat of the car! I'm hoping these little things will stay on his feet better and keep his feet cozy this winter.


Thursday, November 15, 2012
Buttons
Soon I hope to be sharing a crochet pattern for a gingerbread man hat, but I still have to find the perfect buttons for the eyes.

 When I was finished with the crocheting part, I got out my jar of buttons to search for big shiny black ones for the eyes. I don't have any, but Little Bub was very interested in playing with the buttons. At first, I was nervous about him trying to put them in his mouth, but he didn't even try once.


We did some sorting by colors, but that wasn't as fun as picking them up and waving our hands around to get them off. There may still be some buttons swimming in the carpet, but it entertained Little Bub for about forty minutes!
Tuesday, November 13, 2012
Crochet Turkey Hat
In a previous post, I may have mentioned my current obsession with making holiday or season themed crochet hats for my son. (I am well aware he may want to kill me when he's older after seeing all the pictures!).
As my hat count continues to grow, I have become more adventurous with my hook. For a long time, I bought the patterns from Sunset Crochet on Etsy. Her patterns are very easy for beginngers and they consistently turn out well.
Now I get to share one of my own creations with you. Bear with me, as this is the very first pattern I have ever written myself! Feel free to let me know if you have any problems with it.
This is sized for my one-year-old. If you would like help figuring out how to make it smaller or larger, let me know.
 Using a J hook
Round 2: Ch 2, hdc in same hdc, 2 hdc in next hdc and each hdc around. Join with slst to first hdc. (20 hdc)
Round 3: Ch 2, hdc in same stitch and in next stitch. *2 hdc in next stitch, hdc in next stitch. Repeat from * around. Join with slst to first hdc. (30 hdc)
Round 4: Ch 2, hdc in same stitch and in next 2 stitches. *2 hdc in next stitch, hdc in next 2 stitches. Repeat from * around. Join with slst to first hdc. (40 hdc)
Round 5: Ch 2, hdc in same stitch and in next 3 stitches. *2 hdc in next stitch, hdc in next 3 stitches. Repeat from * around. Join with slst to first hdc. (50 hdc)
Round 6: Ch 2, hdc in same stitch and in next 4 stitches. *2 hdc in next stitch, hdc in next 4 stitches. Repeat from * around. Join with slst to first hdc. (60 hdc)
Rounds 7-14: Ch 2, hdc in next stitch and each stitch around. Join with slst to first hdc. (60 hdc)
Round 15: With orange, ch 1, sc in next 14 hdc, ch 19, sc in 2nd ch from hook and next 5 chs, ch 7, sc in 2nd ch from hook and next 5 chs, ch 7, sc in 2nd ch from hook and next 5 chs, sc in remaining 12 chs back to edge of hat. Sc in next 28 hdc, ch 19, sc in 2nd ch from hook and next 5 chs, ch 7, sc in 2nd ch from hook and next 5 chs, ch 7, sc in 2nd ch from hook and next 5 chs, sc in remaining 12 chs back to edge of hat. Sc in remaining 14 hdc. Join with slst to first sc. Finish off.

Make 2 eyes.
With white, ch 3, slst in first ch to form loop.
Round 1: Ch 3, 7 dc in loop. Join with slst to first dc. (8 dc)
Round 2: Ch 2, hdc in same stitch. 2 hdc in next dc and each dc around. Join with slst to first hdc. (16 hdc) Finish off.
With black, ch 3, slst in first ch to form loop.
Round 1: Ch 2, 7 hdc in loop. Join with slst to first hdc. (8 hdc) Finish off.
Whip stitch black pupils to eyes. Whip stitch eyes on hat.
Round 1: Sc into second loop from hook to end of row. Turn.
Round 2 to end: Repeat row one until you have 1 stitch left on hook.
To finish off beak, sc around the entire perimeter of the beak, with 3 sc into each of the 3 corners. Finish off. Whip stitch beak to hat.
Make one snood.
With red, ch 15. 2 hdc in 3rd chain from hook, 2 hdc in each chain across. Finish off. Whip stitch to hat.
 Make 3-6 feathers in any chosen colors.
Ch 9, sc 2nd ch from hook, sc next, hdc next 2, dc in 3, 2 dc in same stitch, dc in next 3, hdc in next 2, sc in next 2, slst in first sc. Finish off. Whip stitch in place on hat.As you can see, I made 6 feathers and placed three on the top of the hat and three on the back at the bottom for a little bit of the tail. I personally think it's adorable and perfect for celebrating Thanksgiving. I'm not sure Little Bub will feel the same when he's looking back at the pictures when he's 18!
As my hat count continues to grow, I have become more adventurous with my hook. For a long time, I bought the patterns from Sunset Crochet on Etsy. Her patterns are very easy for beginngers and they consistently turn out well.
Now I get to share one of my own creations with you. Bear with me, as this is the very first pattern I have ever written myself! Feel free to let me know if you have any problems with it.
This is sized for my one-year-old. If you would like help figuring out how to make it smaller or larger, let me know.

With brown, Ch 3, slst in
first ch to form a loop.
Round
1: Ch 2
(counts as hdc), 9 hdc in loop. Join with slst to first hdc. (10 hdc) Round 2: Ch 2, hdc in same hdc, 2 hdc in next hdc and each hdc around. Join with slst to first hdc. (20 hdc)
Round 3: Ch 2, hdc in same stitch and in next stitch. *2 hdc in next stitch, hdc in next stitch. Repeat from * around. Join with slst to first hdc. (30 hdc)
Round 4: Ch 2, hdc in same stitch and in next 2 stitches. *2 hdc in next stitch, hdc in next 2 stitches. Repeat from * around. Join with slst to first hdc. (40 hdc)
Round 5: Ch 2, hdc in same stitch and in next 3 stitches. *2 hdc in next stitch, hdc in next 3 stitches. Repeat from * around. Join with slst to first hdc. (50 hdc)
Round 6: Ch 2, hdc in same stitch and in next 4 stitches. *2 hdc in next stitch, hdc in next 4 stitches. Repeat from * around. Join with slst to first hdc. (60 hdc)
Rounds 7-14: Ch 2, hdc in next stitch and each stitch around. Join with slst to first hdc. (60 hdc)
Round 15: With orange, ch 1, sc in next 14 hdc, ch 19, sc in 2nd ch from hook and next 5 chs, ch 7, sc in 2nd ch from hook and next 5 chs, ch 7, sc in 2nd ch from hook and next 5 chs, sc in remaining 12 chs back to edge of hat. Sc in next 28 hdc, ch 19, sc in 2nd ch from hook and next 5 chs, ch 7, sc in 2nd ch from hook and next 5 chs, ch 7, sc in 2nd ch from hook and next 5 chs, sc in remaining 12 chs back to edge of hat. Sc in remaining 14 hdc. Join with slst to first sc. Finish off.

Make 2 eyes.
With white, ch 3, slst in first ch to form loop.
Round 1: Ch 3, 7 dc in loop. Join with slst to first dc. (8 dc)
Round 2: Ch 2, hdc in same stitch. 2 hdc in next dc and each dc around. Join with slst to first hdc. (16 hdc) Finish off.
With black, ch 3, slst in first ch to form loop.
Round 1: Ch 2, 7 hdc in loop. Join with slst to first hdc. (8 hdc) Finish off.
Whip stitch black pupils to eyes. Whip stitch eyes on hat.
Make one
beak.
With orange, ch 6.Round 1: Sc into second loop from hook to end of row. Turn.
Round 2 to end: Repeat row one until you have 1 stitch left on hook.
To finish off beak, sc around the entire perimeter of the beak, with 3 sc into each of the 3 corners. Finish off. Whip stitch beak to hat.
Make one snood.
With red, ch 15. 2 hdc in 3rd chain from hook, 2 hdc in each chain across. Finish off. Whip stitch to hat.

Ch 9, sc 2nd ch from hook, sc next, hdc next 2, dc in 3, 2 dc in same stitch, dc in next 3, hdc in next 2, sc in next 2, slst in first sc. Finish off. Whip stitch in place on hat.As you can see, I made 6 feathers and placed three on the top of the hat and three on the back at the bottom for a little bit of the tail. I personally think it's adorable and perfect for celebrating Thanksgiving. I'm not sure Little Bub will feel the same when he's looking back at the pictures when he's 18!
Sunday, November 11, 2012
Mission Accomplished
Little Bub's first birthday party went pretty well. There was a little bit of last minute scrambling to clean the house and finish the baking. I definitely recommend doing an appetizer party or something similar. It's very easy to prepare most of the food (in this case fruit) and the clean-up is also a breeze.

I was surprised at how much people ate! The party was from 2-4 PM and I was only serving snack type food, like what the caterpillar ate in The Very Hungry Caterpillar. By the end of the party, the whole cheese, cracker and salami plate was gone, as well as the pickles and all but 4 slices of pear.

The punch was also a hit! Just a few drops at the bottom of the bowl. We used Lemon Berry Punch and 7Up with raspberry sherbert.

First we opened gifts. Little Bub received so many cool toys, books and puzzles. My family went with a theme and gave him lots of musical instruments, like the Band in a Box.


Now I'm ready to take a little break from all the planning and the prepping. Just in time to get started on some Christmas activities!
Friday, November 9, 2012
The Birthday Boy
We also spent yesterday afternoon finishing a birthday photo shoot. Here is the little man himself!

Happy 1st Birthday!!
Desserts and Printables
Today is the big day! Little Bub turned one today and we spent the afternoon house hunting. What an expensive first birthday present! :)
Yesterday I spent the afternoon baking. I was inspired by the cake pop caterpillar at Pottery Barn Kids. I made the cake part and plan on dipping them in the chocolate in the morning.


Yesterday I spent the afternoon baking. I was inspired by the cake pop caterpillar at Pottery Barn Kids. I made the cake part and plan on dipping them in the chocolate in the morning.

I also made cupcake ice cream cones. Here is a picture from Stick a Fork In It. Mine are not finished yet. I still have to add frosting and the sprinkles.

Finally, I made some plain cupcakes that I plan on dressing up as apples. I bought the recipe book, Hello Cupcake, What's New? a while ago at William and Sonoma. I loved these, but haven't had a chance to make them yet. What better time than a hungry caterpillar birthday party?! I assure you, mine won't be to perfectly shaped, but they'll still taste good!
I also found these labels for free at Polkadots and Puppies. They are perfect for the table and also explain the strange choices for the menu!
Finally, as an activity for the kiddos, I am going to give them a coloring page to take home. Quick and simple favor!

Wednesday, November 7, 2012
Odds and Ends
A few more things I made for Little Bub's birthday this year: a quilt square and a crocheted caterpillar hat.
A while back I bought the book Art to Heart: Count On It at the local quilt shop to brush up on practicing my quilting skills on little small projects. It has a square hanging for each month and I've finished almost all of them! There was also an option to make a cupcake one for birthdays. I figured this would be a nice thing for Little Bub to have every year at his party. I added a little caterpillar with some velcro that can be taken off for next year's party.


A while back I bought the book Art to Heart: Count On It at the local quilt shop to brush up on practicing my quilting skills on little small projects. It has a square hanging for each month and I've finished almost all of them! There was also an option to make a cupcake one for birthdays. I figured this would be a nice thing for Little Bub to have every year at his party. I added a little caterpillar with some velcro that can be taken off for next year's party.

Time for a true confession: I may have an obsession with crocheting hats for Little Bub to wear for every holiday and/or season. Seriously, I will have to post a picture of my ever-growing pile. I actually taught myself to crochet specifically to make hats for my baby before he was born. I certainly wasn't going to buy any crocheted hat for $15 plus when yarn is so cheap! (If you haven't noticed by now, this is an ongoing theme of all my projects!).
When I first started crocheting, I bought my first pattern from Sunset Crochet on Etsy. Her pattern was easy enough for a beginner like me, so that's who most of my patterns come from. She has a pattern for a Very Hungry Caterpillar hat and cocoon set for a newborn size. I just made a larger version of that hat for my soon-to-be one year old. (I also made the newborn size and cocoon for future use!). Little Bub won't be wearing this hat on the day of party probably because he'll be indoors, but it was perfect for his one year photos!

Tuesday, November 6, 2012
Bunting and Garland
To continue with DIY party decorations, I made a few wall decorations. I was inspired by the month-by-month bunting from The Scrap Shoppe, but I wanted to customize it for the Very Hungry Caterpillar theme. My sister-in-law suggested I do circles for the caterpillars body (why didn't I think of that?)
 It was a super simple project. I started with circles cut from green scrapbook paper and cut the pictures a little smaller, then used foam tape to adhere them so the pictures would pop off a little. I wanted to add a little more so I included the head of the caterpillar, added some shiny gold stickers for each month and made some glittery, gold clothespins for some sparkle. I think my guests will enjoy seeing how Little Bub changed over the past year!
I also wanted to make a happy birthday bunting that I could use every year if I wanted to. First I made a triangle template from cardboard and traced it onto the wrong side of the fabric. Then I used pinking shears to cut on the lines, so I could leave the edges unsewn. I used some of the leftover fabric from his shirt and hat (I just love that number fabric - it's so perfect for a birthday!). I used store-bought double fold bias tape and sewed it with metallic gold thread to tie in with the gold clothespins.
I didn't sew down the edges on this yet:
1. the letters are so small they intimidate me
2. I just did this the last weekend before his party and haven't had the time!


Monday, November 5, 2012
The Outfit
As a mother of a little boy, I knew that Little Bub's first birthday outfit wasn't going to be some adorably ruffled and bedazzled number, but I wanted him to have something special and homemade. Looking around the internet I found this shirt that I absolutely loved! I wasn't spending $28 on one shirt for my baby.
I found Very Hungry Caterpillar fabric online at Fat Quarter Shop and bought a couple half yards, then dug out one of his many onesies. Using Heat N' Bond, I created this:
 The only snag I ran into was how to sew down the edges...I couldn't figure out how to do it neatly, quickly and efficiently on my machine, but one of my lovely co-workers at school volunteered to HANDSTITCH it for me. I owe her big.
I also wanted to have special caterpillar themed birthday hats without buying them. I was inspired by this hat on Etsy, but again a $25 hat was not in the budget. I found this easy to follow tutorial at Project Balancing Act about using paper hats to make fabric ones. It worked out great! I made 4 for the kiddo guests to wear and a different one for Little Bub. A little fabric, glue, yarn pom-poms, jumbo rickrack and elastic - they were surprisingly quick and easy to make. I also made a bib backed with a little bit of leftover fleece for Little Bub to wear while devouring his cake.


I found Very Hungry Caterpillar fabric online at Fat Quarter Shop and bought a couple half yards, then dug out one of his many onesies. Using Heat N' Bond, I created this:

I also wanted to have special caterpillar themed birthday hats without buying them. I was inspired by this hat on Etsy, but again a $25 hat was not in the budget. I found this easy to follow tutorial at Project Balancing Act about using paper hats to make fabric ones. It worked out great! I made 4 for the kiddo guests to wear and a different one for Little Bub. A little fabric, glue, yarn pom-poms, jumbo rickrack and elastic - they were surprisingly quick and easy to make. I also made a bib backed with a little bit of leftover fleece for Little Bub to wear while devouring his cake.


And all of this (including the price of fabric) is still less than the $50 I would have spent buying the hat and shirt from Etsy. I'd say it's a success!
Subscribe to:
Posts (Atom)